Friday, October 30, 2015

A Firm Floor for Feet

This camper update was no surprise. When we first saw the craft, we immediately noticed the give and sag of the vinyl flooring. It was still supportive under our weight and wasn't as if you would fall through to the ground, Flintstones style but we knew it was in certain need of repair. The firsts step involved box cutting the well worn vinyl 'tile' out and tossing that mess to the scrap heap. Once removed, we were hit with the realization that once again, we were in the thick of a large scale project.

Original Early 80's tile flooring


The floor was another pancake style build with a top layer of wood underlain by Styrofoam underlain by another piece of wood; all of which was screwed down through the aluminum water barrier on top of the metal frame. We cut out all the flooring down to the aluminum sheeting (which was a lovely turf green) and removed all the scary rusty screws we could. Some had to be dremeled and destroyed beyond recognition. We also pulled all the vinyl out of the cabinets where multiple spots were still wet and soft. Those locations were squirted with some GreatStuff Foam in a can (watch out, it expands alot!) and added wood fillers if it was needed. That should hold for a while, Right?


We laid out planks which were supported by the horizontal running framework. We also marked up with spray paint/tape/marker where these supports were. Numerous times, we almost took the plunge right through the aluminum due to missed steps.

Everyone working Hard to get the flooring Out

For the repairs, we didn't skip steps. We went straight to the plywood boards overlain by a thin sheet of Luan wood. The plywood was cut to replace the center walk way and the entrance area including the interior/exterior accessed cubby (aka the door side kitchen bench). Other spots were deemed ok to stay.


We waiting till after painting the cabinets to install the new flooring. This way, there was no chance to make a mess on our beautiful new floor. And no tape either! (Well at least less tape since the tabletops were to remain original) For the cabinet body color, we used paint from the hardware store that was a mismatched batch for reduced price. It also was a special type of paint to reduce chips when bumped or knocked. We got primer and paint in place and let dry for a week.

When we came back, the floor was fit for install. We used remnants of the flooring from the cabin that Mark was more than willing to give up and get out the door. The tongue-in-groove fitment was a little tricky at first to operate with but after some pushing, and cutting and wedging, we put the majority of the panels in place. All in all, we had ONLY one whole plank and a couple small scraps left. AMAZING
We have yet to do the trim pieces along the edge which will seal any gaps and give a nice finish. Until then, here's some pictures of what it looks like. We got some of the cabinets (drawers) in last weekend with new home made dividers and will be putting the rest of them on hopefully this weekend.


Not bad huh. Well we are getting there piece by piece and hopefully can sum up the major stuff before it gets too darn cold to be outside in the weather.

Thursday, October 22, 2015

Almost Framous

This one was a relatively easy 'fix' on our Camper so I wont draw out a long story. The original color of the frame, bumpers and tongue was a lovely rusty brown. YUM. Reminded me of everyone's favorite emoji. We used a power drill sanding wheel bit (home depot) and a circular sander to get most of the rust off. Pulled the Propane tank off and taped the body.

BEFORE


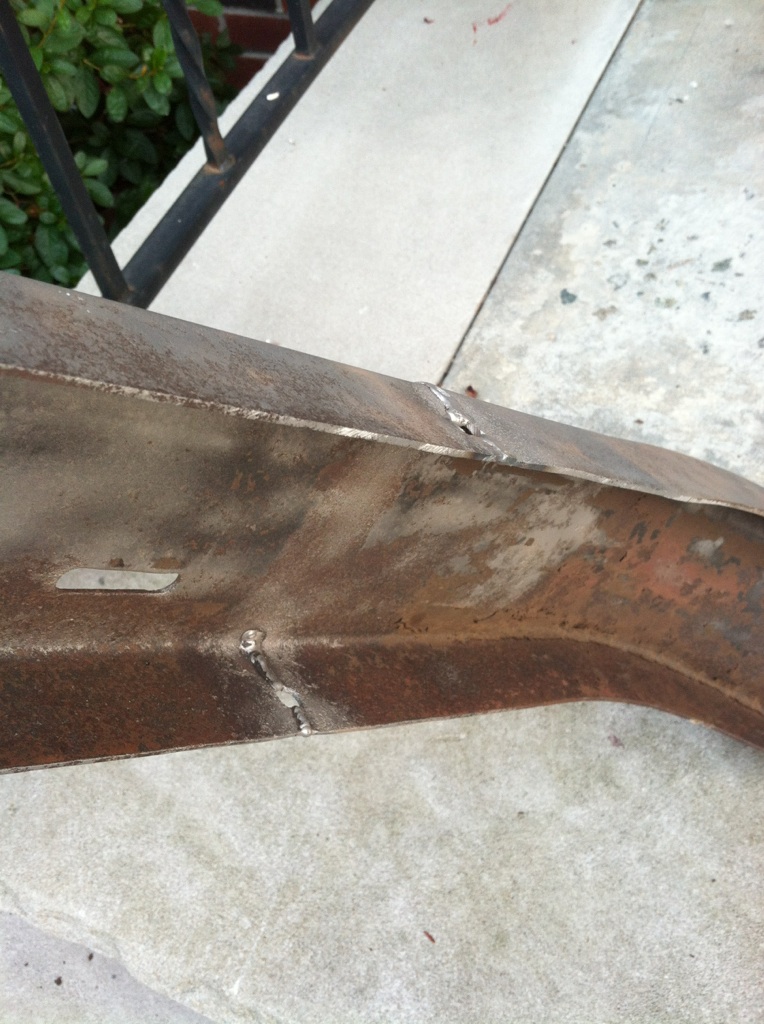
The rear left bumper had been hit (or hit something) and was bent out of shape. My father worked his connections and was able to get this repaired by an old work buddy at no cost! Reshaped and welded as needed in addition to a good sanding from their shop.
Special THANKS to Tolin Design in Emerson NJ.

BEFORE

AFTER


Screw hardware was replaced for each bumper in the rear and the stabilizing feet were swapped all around since the jack-holes were beginning to warp and we feared it might break in our travels.

AFTER PAINT AND NEW JACKS


The original A-frame tongue jack had a bum wheel and a broken and bent crank handle along with being a huge rust bucket. The jack and A-Frame section was welded on so we cut off the jack and weld beads with a lot of elbow grease and a hack saw. 

The new jack was bought on Amazon and is mounted on the door side (left) of the camper. When hooked up to our tow vehicle (TV), it releases from vertical and swings to a horizontal position for transport.

We anticipate painting the bed support poles (6x) black to match the frame but that's still to come. The black is a nice solid color and should prevent future rust accumulation. In total, I used 3X Cans of Rustoleum Black Spray paint. Nothing special here.


A Rough Roof to Rassle With

So here we are in Late October. The weather is getting colder and the nights, longer. We are approaching winter at a breakneck speed and yet this Camptastrophy is still in the works. Over the past few months, Liz and I slaved in the elements (mainly nice weather) being the weekend warriors and tasking to fix this dream machine up to snuff. We still have a lot on our plate seeing as how the canvas is removed from the rig, the drawers are strewn about the cabin, the batteries are as confused as the guy who has to wire them and a million other bits and bobs that need to be placed that are still in limbo. So what went wrong? Last post we were so positive and optimistic about the fun fixer upper we had purchased. Well, let me tell you the short and long of the Rough Roof Story.


Isn't she beautiful in the picture above. A real gem of a camper from the early 80's. Hard body, rugged aired-up wheels, a frame with minimal rust and a propane tank that has seen some places. We thought we were in the clear. Some primer and paint, a couple screws here and there. So what if the floor bowed and sagged when you walked on it. We could manage. That is until the roof collapses and we get squished to death in a horrible pancake of plywood and aluminum.
 
The original camper had latching hardware on the roof and near the top of the base to winch the roof down tight for travel. As I went to replace these pieces (one of my first mods of many), I noticed that some of the screws just fell out of their hole with a poof of dust while others kinda gooped out with old stinky blackness on them.
 
I am not sure how it happened but this poor old girl was suffering. She had ROT. Some sides were wet while the others were desert dry and looked burned. What could do such a thing. . . oh yeah, neglect. The roof had to be fixed in this condition. It was a safety issue as are many things with the camper.

It started with a heave-ho and ended in cussing, running around and figuring out how we got here. In order to fix a roof, one must remove said roof. Simple right. Campers are built out of lightweight things like Styrofoam and aluminum right? Yes while this is true, they weigh about a metric ton when wet and rotting. Also this thing had enough sloppy silicone jobs to kill a small village.
 
Liz and I managed to remove the roof from the body of the camper, going over the risers, and really giving our all. We laid it upside down aside the camper and realized that this just got involved. The ceiling panels (glorified cardboard) was the first piece of the puzzle to go. See Ya. After that, we removed the sides which were basically constructed as follows.
EXTERIOR Aluminum [ Choice of wood rot ] Aluminum INTERIOR


Simple stuff. Remove the wood rot, buy new wood, replace, and suture back together with some wood screws. Not so simple. Insert our first genius idea of the lot.
 
Liz and I devised a plan since we are genius'. We can reduce the weight of the ceiling, which in tern reduce the weight of our camper. GREAT! We thought we could achieve this by using a framework of wood (as opposed to a solid piece the full length) with Styrofoam in the empty spaces. We sure got an A for Effort on this one.
 
TO THE HARDWARE STORE!
 
We bought wood, screws, some tools, Styrofoam, new plastic ceiling panels, about 50 of those metal spikey plates that you hammer into two planks of wood to get me to join forces.
These bitches
They hurt when you touch them or even look at them for that matter and we just bought stock in em'. So we get to hammering. And we measure and cut and score and cuss and hammer and cut and measure and measure twice cause that's important to some people and cuss some-more and hammer and . . . day one was a blast.
 
Day two, oh joy. Sundays are always shorter because we have to get back home by the end of the night. So we carry on. We get most of the building done but wait, not enough spikey things!
 
TO THE HARDWARE STORE.
 
Buy 75 more and return what we didn't use. Surely another bright idea. Sunday goes by fast and then we are forced to call it a weekend. We pack up shop and tarp the camper body, cause you know, we lack a roof and stuff. 
 
Fast forward 5 days and its Friday again. Woo hoo the camper crusade continues. We try and get all the pieces of the roof back together but is isn't going well. the Framework replacement is flimsy and aluminum is rough and sharp at the same time. We struggled with this for some time and got lost in a couple other side projects and by the end of it, its Sunday and we go home back to our 9-5 and dog walks around Wedgewood Gardens. Joy


The next weekend, we had the aid of Mr. Mark Fulton. He took a look at our operations with the roof and tried to help. He saw the practicality but the possibilities stopped at potential. He knew early on that the framework would be a bust and made the fatherly decision to take this project over and do it right.
 
TO THE HARDWARE STORE
 
He bought the plywood as a whole piece and brought a bunch of power tools from home to help get things cut and shaped. Even with his help, we were still unable to get everything pieced back together. Pack it all up and see ya next week!
 
Our fearless trio continued to put it all back together with much frustrations. We decided to scrap the interior aluminum panel to make it all fit back together better. It worked. We mended the roof and it was finally ONE PIECE AGAIN! Success! 
 
 
We flipped the lid and gave the exterior a good power wash which worked wonders turning it from grimy black/brown to a off-white color. Bondo sealed the cracks and holes that numerous past owners had placed in the bonnet. We used a special paint to give the roof a new coat (or three) bought from Walmart. The paint is called Kool Seal Elastomeric Paint (Coating) As seen here Of course every Walmart for a 100 mile radius was sold out of the stuff and it didn't make sense to buy online since we were in a rush to paint. I found two cans in the Clinton NJ store and had them put it on hold. Woot. (Side note; the Walmart near the cabin was fully stocked (20 plus cans) a week ago when we were there. Guess they decided to restock)
 
This gave the roof a nice white color while also providing flexibility to the structure in addition to promoting temperature regulation. The white rubberized coating will seal in heat when we want and will reflect hot sun rays when we are hot.
 
Our next challenge was the ceiling panels. We replaced the original 'cardboard' pieces with three plastic panels from home depot. We bought trim and it looked great at first. Sure enough though, we didn't use enough adhesive in the original install and when we came back the next week, the panels were falling off the ceiling. We did another round of adhesive to really glue it good but STILL, the panels are falling down :( To this day, we are still trying to get the ceiling to stay but we came up with a slightly unorthodox method. Since the ceiling body is namely Styrofoam as seen in  pictures above, there isn't much to tap into. We are going to use screws to eventually hold it all up. To make the screws a little less unsightly, we are anticipating placing them in constellation patterns and using glow in the dark paint to color the screw heads and have them glow at night. As of now, this is a 'to-be-installed' project.
 
This project was a lot more than anticipated and took a huge chunk of our time to get situated. Luckily, we are close to completion with this task and many others. Thanks for reading and stay tuned for further renovation updates including frame painting, metal working, flooring replacement, canvas sewing, battery hookup . . . .Oy vey

Friday, September 11, 2015

Welcome to No Place Like Gnome

Greetings and Salutations reader!
My name is Chris G and I am about to embark on a journey that I would have never considered possible. My beautiful girlfriend Liz and our crazy pit-mix Ziggy are planning a trip of epic proportions. But first some background.
I grew up in the small town of Emerson NJ and lived with my folks till college. Graduated from Richard Stockton College with a BS in Environmental Studies and immediately found a job in the Environmental Science field. The job was a huge stepping point in my life towards adulthood. While other friends and classmates struggled to find work opportunities, I had a fairly well paying job playing the role as a consultant and field hand for a large company in NJ. With time comes experience and I went from the low totem up a step to an unofficial assistant field manager.

Even though I was putting in 50+ hours a week and commuting to Trenton area everyday (2+ hour drive one way), I managed to find time to get on that internet dating scene. OKCupid hooked me up with one or two prospects but none of them compared to the gem of a girl I finally found. Liz was like no one else. Our similar interests were on par along with our strange interactions and communications that felt way too natural to ignore. She truly intrigued me. One date led to another and this little relationship got more and more serious. In November 2015, it will be three years since our first meet.

Eventually my fieldwork prospects dried up, the company went through a division of sorts and lost a lot of its employees which had given it its merit. I was thrown into an office with no windows in the back of a building and asked nicely to perform the clerical duties of a science monkey. I knew that's not what I wanted to do and pleaded with the boss to find me bigger and better opportunities. Alas, those opportunities never arose so it was onto the next place.

I landed a gig with a similar company, once again acting the part of a profession consultant for their geology department. This time however, the company was much smaller and interacted with both home owners and high rollers. Field work was now a thing again and I got to be outside in new places I had never visited before. I have seen many nooks and crannies of the 5 boroughs, new jersey, and PA that most people on the tourist circuit will never see. I was writing reports and interacting with managers, coworkers and clients all at once. It definitely was an interested ride but there was a tension growing.

It started with a thought. Liz was struggling with her position, also as an environmental scientist, yet denied the beauties of fieldwork. She was set behind a computer and told to do excel spreadsheets and other menial task that once again, a foreign temp worker could complete. This wasn't what she spent four years studying for. She wanted more. She begged the question.

"What if I quit my job?" Each day it was a challenge for her and I could see it wearing her down. Days turned to months, turned to a year and she still wasn't getting satisfaction from her employment. So you quit your shit job and then what? Find the next one and hope it's better? What else is out there? What if its a job on the other side of the country? What's the game plan?

She proposed the notion to travel. See the USA and go places we haven't been. Maybe the opportunities we seek are there hiding in the woodwork of this fine nation. A vacation is one thing but she wanted bigger. At first, I was very hesitant about the whole operation. I was a hermit to New Jersey and only ventured outside the 'comforts' for brief periods on vacation. Luckily, my parents were willing to take me to Yellowstone, Acadia, Muir Woods... and so that passion for the outdoors was there in my subconscious.

It grew on me. The idea of a long term travel arrangement stuck in my mind. It grew and festered into something beautiful. Traveling seemed like a magnificent dream with way too many details for someone with acute OCD to figure out. I confronted Liz about this new desire to be a runaway with her and our dog Ziggy. -'Were strong, smart, passionate people and can make it anywhere we find our hearts to reside.'- This is the theory I will try and run with as this experiment goes on.

The Experiment: See how long we can make it in the wild as jobless mid 20-somethings with a few skills and dollars in the bank and a desire to find what's next.

The Plan: As of February 2016, Liz and I will have cut ties with our companies and cashed that last pay check. We will boost our wanderlust with a short two-week trip to New Zealand with our fathers. (Separate Story) Then on our return, we plan to start our trip around the country.

The Home away from Home: We poked around Craigslist for a while looking for our home-on-wheels. We needed cheap, OK-Good condition with a few necessaries such as larger living space and a fridge. We saw many options from distant locations but didn't seem to fit the bill. Finally, we found our craft. She was posted for $750 but with my GF's awesome haggling skills, we got it for $600.
The 1983 Starcraft Galaxy 24' Popup Camper is complete with two beds (Queen), ample storage, a sink, fridge, heater but oh was she a fixer'-upper. We knew from right off the bat that the flooring was 'soggy' and some other cosmetic options were to come for the wood paneling everywhere. If only we knew what we were getting our selves into.


With the money burning a hole in our pocket and the tow hitch freshly installed on the Subaru Outback, we purchased the behemoth of a pop-up and schlepped it to Belvidere NJ; our dedicated destruction and hopefully continued reconstruction spot.

This blog will be dedicated of the times to come. The continued redevelopment of the GalaxyGnome (our camper mascot) and our journeys from the road. Please check back periodically to make sure I'm still alive. If you don't see posts, were boondocking with no coverage and enjoying life off the grid.
Thanks - Chris