Showing posts with label DIY. Show all posts

Sunday, April 24, 2016

The Reward

Its done. Well at least for the most part. The past year and probably a few thousand man and woman hours spent thinking, designing and crafting, cursing when it breaks, and recrafting our adventure-mobile and its finally hit the road.
On April 19th, Liz, Ziggy and myself packed the Subaru Outback and said our goodbyes to our host Mark Fulton. The camper was already packed and ready for the road. We hesitate. Its been so long thinking about this final moment.

And then we left.

I had planned out a few spots to stop to get to our first campsite. First along the way was Great Falls National Park in McLean, Virginia. The historic location was a meeting grounds between native Americans and the colonists. It also hosted a canal used to bypass the rapids and falls that cascaded that section of the River. We pull up to the entrance and much to our surprise, the $10 admission was waved for this week for all National Parks including forests, monuments, coastal zones etc. SCORE!
The Subie and Camper get parked in the way back nose bleeds and we walk to the visitor center. Ziggy managed to keep his cool most of the time while other dogs walked by. The paved trail took us to numerous lookouts along the rapids and falls. Our favorite was lookout 3. Some visitors were nice enough to take some pictures.


Moving onward, the Roamin Gnome travelled south into Virginia which I am told is for lovers. The highway takes us to a local road. Then a nice winding road through George Washington NF and then to a dirt road. We have a quarter tank of gas and w just turned down a dirt road for our first night with the camper. Meanwhile its rounding 6:30pm. The Subaru handles the rocky road like and champ and the new axle provides a nice ride for the house on wheels and its contents. The road continues and a few miles and then we see it.  A sign pointing us in the right direction for the Little Fort Camp Ground. A short drive through the 8 site campground tells us which spot to park the gnome. Backed in and beautiful, we staked claim to the roomy and private site 6.


Our first time unpacking it all and we did fairly well. The sun was still setting and we had more than enough light to make camp including awning placement, hammocks and the cook station. Liz whipped up and amazing meal using the following canned items: Chicken from Costco, black beans, tomato sauce and BLANK. Cooked on the cast iron skillet and served with chips, sour cream and shredded cheese; the only thing that could make it better would be bacon. Eat, clean and rest. The tie dye bed is made and we turn in for the night.


The next morning, we awake to what sounds like a chainsaw right outside our camper. WTF! We sneak a look through the bed windows and its an official park employee trimming the bushes around the drop toilet. We at least he meant no harm. The guy does his job and then walked up the trail. As he approaches, he asked if I had a jumper. Apparently the office installs radios in their work trucks that continually drain the battery. Smart!

After the jump, he thanks me and introduces himself. Charlie has worked for the parks system for 15 years and loves it. Retired navy, he was the kindest guy who gave us the hot tip to a natural spring well nearby and the Firetower up the road. He also gave us two smokey the bear bandanas and gave Zig some doggie biscuits. Aside from Charlie and another woman camping, we had a very secluded and enjoyable day thus far. After a leisure stroll of the campground, we begin to forage for a snack. Our guide books i.d. dandelion root and violets are good grub. The violet heads can be plucked and eaten on the spot. The dandelion roots need to be cleaned and cooked before serving.

In the afternoon, another couple miles of dirt/gravel roads lined with campers and scary shacks led us to the fresh water spring. We fill our water jugs and the 5 gallon shower for later use. On the way back to our camp, we drove up the fire tower road and then followed a short trail to reach the base of the Woodstock fire tower. I was able to muster the confidence and beat my fear of heights to summit the 50 stairs to the top. The  view was fairly stellar and showed the valleys of the region along with a serpenting river.

Back at camp, we unpacked the water and fell victim to a leisure lul. For dinner we had mac and cheese with sauteed dandelions (which were really bitter)oh well. That night slept well.
In the AM, we broke camp and packed it all in to head for Shenandoah. We entered through the north gate waiving the $20 entrance fee and drove Skyline Drive for the 30 something miles till the Luray exit. Unfortunately, due to a massive wildfire in the southern portion of the park, a majority of the route was closed and the vistas were hazy due to smoke wafting. Hopefully the firefighters can get the blaze under control but its a pretty big one.


We exited Shenandoah through the Luray exit and drove Route 211 to 81 and then right through the center of Harrisonburg which is a tight circle in a busy area. Great for a pop-up to zip through. Our next campsite was once again in a length of George Washington NF at Hone Quarry. This one night stop by a stream was a great for the night with the small fee of 5$. During the night, we went frog hunting and came across this Fowler's Toad who was very photogenic.


In the AM we wasted no time packing up to head out before the rain came through. With camper and family packed in, we headed south once more to head for our next camp, Oronoco Campsite outside of Buena Vista VA. We plan to set up base here for the next few days (sans cell/wifi reception) before heading out to our first WWOOFing experience starting next Monday at Sylvanaqua Farms in Earlysville VA. We plan to spend a week with this endeavor before moving on to the next leg of our adventures. Stay tuned and thanks for reading.

Wednesday, April 13, 2016

What to do with No.1 and No.2


Living in a 30 something year old pop up camper has its merits. 

Merit 1: It was cheap
Merit 2: It was in 'decent' shape
Merit 3: It was portable

One flaw is the lack of facilities, ie bathroom stuff. 
For some time now, people have been asking what we plan to do with number one and number two. The option to go into the wild and dig out a cat-hole is always a possibility but sometimes you want a little privacy or the elements are not in your favor. Well, we weighed the options and it seemed that the most responsible thing to do, would be utilize a composting toilet. There are many on the market if you do a simple search but they can range in price from $35 to upwards of 100. But what makes it so expensive?

Well the issue with waste is that when combined, the urine and feces together make a biological hazard; namely due to the urine (ammonia). When you keep the two separate however, the potential for catastrophic disasters is greatly reduced. These composting toilets are specially designed to do just that, separate the one and two. Why couldn't we just do that?

With a couple trips to the hardware store, we had all the things we needed.
Materials:

  1. 5 Gallon Bucket
  2. 5 gallon bucket toilet seat (bought on Amazon)
  3. Biodegradable kitchen bags (bought on Amazon)
  4. Coconut Fibers/Saw dust (bought on Amazon)
  5. A funnel (Size and design is up to the user)
  6. Small length of aquarium tubing
  7. 2 Rubber stopper
  8. Bottle for liquids (We used Gatorade)
  9. Feminine urination aid [Go Girl] (if desired)

Instructions:
  • A hole was drilled in the rubber stopper to accommodate for the insertion of the aquarium hose.
  • The stopper was plugged into the bottom of the funnel
  • The funnel was cut to size and screwed onto the bucket and the position and height for its main user.
  • A hole was drilled at the appropriate height and size to run the tubing from interior to exterior of bucket.
  • Another rubber stopper was drilled to accommodate for the hose at the bottle end of the tube.
  • A 1" hole was drilled into the cap of the Gatorade bottle.
  • Biodegradable bags will line the interior of the bucket 

  • Expand coconut fibers with water to be spread on top of each deposit to reduce smell and aid in decomposition.
  • When the bio-bag is full, it can be trashed or buried.
  • When the bottle is full or after each use, it can be disposed of outside.

And that't it, at least in theory. We will see how things really work out when we test the setup on the road. The bucket setup fits nicely in an old milk carton and will be strapped to the trailer tongue securely for transport and storage.

Monday, March 28, 2016

Minor Projects Coming to Completion

As seen in the prior video update, the camper was last shown in a state of paint with tape all around. Well, after 'careful' primer applications and numerous coats of white and green paints, we finished the dual stripe paint job. Along with body paint, we decided to also slap on another two coats of Elastomeric Paint on the roof. This brought it back to white once more and also was a much nicer finish when done in the garage as opposed to the lot at the lake house. Liz painstakingly took it upon her self to perform custom decal work which came out amazing. The Roamin Gnome is on both sides along with hand painted text. A work of art which took hours, days, almost weeks of wrist cramps and back aches.


Once the gnome was on, we were able to do some clear coat spray all around. Hopefully, this will help with paint retention as this 33 year old camper bounds down the roadways of America. This was a much larger undertaken than originally thought but at a cost of about $50 in spray paint, the outcome was worth it. It renewed the campers appeal and made us happy to be that much closer to living in a beautiful mobile abode.

Other accomplishments that have been achieved in the past few weeks include the following.

-- Liz learned the fine art of sewing via an older Pfaff machine. She set up camp in the dining room with trimmings on the kitchen floor. She made short work of putting the foam cushions back together. They are a fun amber pattern with nice thick naugahyde fabric on the bottom to take the brunt of our rumps. She continues the laborious task of getting the canvas in better shape. Three of five panels are completed but unfortunately, the hardest are saved for last. Once, completed, they can be remounted on the camper.


-- The propane systems were installed which had to be established on a newly constructed tray at the frame tongue. The location for the dual 20lb tank setup was determined by the size of the exterior protective shell. The poles for the beds clear the shell by a hair. Each 20lb tank has been hosed to a regulator with auto change over of supply once empty. Additionally, each tank has a basic meter at the neck to keep track of consumption (the meter glows in the dark too!). The hose lines were reassessed and certain problem areas were tightened up using propane specific thread tape to prevent leaks. A safe system is a great system.


One thing learned is the trick of the quick connect which were previously installed in the "kitchen" and exterior hose of the camper near the entrance. The quick connect on these models were used to quickly connect and disconnect the original grill to the propane system. Unfortunately, we did not acquire the grill with the purchase of the camper. We picked up a Coleman dual burner for $5 last season at a garage sale and also bought a Mr. Heater buddy for chilly nights on the trail. These two propane items were harder to connect than anticipated.

Going back to the original installed hardware, the quick connect required a small male adapter to fit the connector. You can purchase these online so I decided to replace both quick connect hardware items which came with both pieces of the puzzle. Unfortunately the end of this connector is now way too small to attached to either item. I went to the local RV shop which had every bit and bob one could want. In the propane section, I managed to find just the right coupler to get it all pieced together. Both the grill and the heater have been tested and work just as they should. Unfortunately, with this system feeding through a regulator, the flame on the grills is very small but will get the job done.

-- The 33YO Norcold two-tier 3-way refrigerator with ice compartment was investigated. The interior had some black funk growing in it and was scrubbed with Totally Awesome Cleaner and a melamine (Mr. Clean) sponge. It buffed right up on the inside. The door was taken off and a sheet of tin metal was glued to the front after a fun pattern was painted on. This was done with intent for a magnet collection in the near future!


Now for the fun stuff. The fridge wiring, albeit only two wires, hot and ground, were giving me issues and not providing any measurable power from the converter sourcing inside the camper. The prior owner had wired the fridge power to a battery-out line on the converter which also ran to the wire harness? This really made no sense since this wire was then rewired to hook up the converter with the battery bank. Back to the fridge, a new wire with juice was rerouted from the converter back to the fridge to provide a power source. It worked when everything was set up and the fridge actually showed signs of a chilly life after a night of being powered on. Prior to this success, we were fearful that the purchase of a new or used (hard to find) $600+ fridge would be in our future. Now you say, "Chris, why would you purchase a fridge that expense instead of buying a $100 dorm fridge from Target?" Well, the specialty fridges in RVs are set to receive power from three sources, AC (shore/plug in power) / DC (battery) & Propane.

And speaking of propane, since the gas system had recently been installed and inspected, I was able to give this part of the fridge a go. I read the dusty placard which was barely legible on the rear of the fridge.The short list of instructions told me to prime the system with gas via a "trigger" and then to set a spark with the built in igniter. Well, the first time was a near miss with a small fireball poofing out of the system and quickly dissipating in the garage. Phew. I brought the fire extinguisher closer to my chair. The next go around, I primed it just right but the igniter was failing to spark. The good ol grill lighter was found and used to provide flame to the gas coming out of the port in the view-hole. The flame caught and kept for a good five minutes. Enough to tell me that both systems were up and running. Lastly was to secure the third connection of battery.


-- Another Chris project was to construct and wire a "simple" camper system. When all was said and done, dozens of connections had to be traced and rewired in frustrating and confusing explorations below the framework of the camper. I decided to install a battery bank consisting of two inline 6V golf cart batteries to provide 12volt DC power to the camper lights and fridge in addition to a 400W power inverter. The inverter takes the DC power form the battery bank and inverts it to an AC source for two built in outlets and four USB ports. This should be more than enough to keep us charged up when we are off the grid. The batteries were installed in a leak proof marine battery box which literally just clears the seat height. It is a snug fit vertically.


In the battery compartment, we also hard installed the power converter for the solar panels which were recently purchased from Harbor Freight tools during a recent sale. The three panel system is mounted on a PVC framework and is relatively light to transport. In direct sunlight, the panels provide up to 45Watts of power to the battery system and will keep us charging in the sunshine. The array is movable up to about 50 feet from the camper so we can rest in the shade while the light powers the panels. Liz anticipates sewing a basic canvas sheath for the whole array so we done have to fully deconstruct each time we pack camp.


-- A new spare tire is to be installed since the old one is dry rotted on the side walls and the steel was well rusted within the hub. Doesn't seem logical to have a spare which might require a spare. I managed to get a steal on a tire and wheel combo from an online distributor. Woo.

-- A new deadbolt was installed which required surgical style dremeling on the door and wall panels in the camper. The task was completed in a few hours of stumbling around and double checking before drilling giant holes in the door. Attention to details provided a great result and provides extra safety with a lock and key compared to when the gnome was acquired.


-- Roof latches were installed to hold the lid to the body while in transit. Prior to this install, we rode it with a ratchet strap keeping everything together.

-- Plastic trim was reinstalled around the lid and lip of the camper. At first, it was a mega struggle but once the hairdryer was used to heat up the plastic for a bit, it became more pliable and was a much easier task to tackle.

-- The storage under the seat has begun stocking phase.


-- Materials have been purchased and blueprints are in place for the outdoor solar shower set up which will include a roof mounted PVC box  framework which will hang a lite privacy cloth. Additionally, the temporary structure will hold the 5 gallon water bladder in place on the roof while it showers us with sun-warmed water.

-- The on board water holding system was reevaluated and numerous small fixes were noted and performed to include the gravity feed apparatus, the fold down (and up) foot pump and a direct feed line with check valve to prevent backflow into the other systems. The whole thing is yet to be field tested but in theory, should work. I'm sure more minor tweaks are to come.


-- Materials have been purchase and blueprints are in place for the outdoor . . .awning (its ok if you thought I was going to say solar shower). The awning will stretch the length of the camper and reach out about 7' out from the body using a series of painters poles, two 90 degree metal rails and some grommets. Stay tuned for that debacle.

-- Blueprints have been drafted for a composting toilet and a vermiculture composting bin for food scraps. More to come on these projects.

-- And the most import mod - Stickers have been installed on the Roamin Gnome! Huzzah!


Lastly, we reached out to our first WWOOFing farm in Hot Springs NC. At first, I assumed the user profile was no longer active since a few days went by without correspondence. Then, they emailed back apologizing for a slow return and that things were busy on their end; sounds like they need a helping hand or two to come on down. We hope to get there by late April with undetermined stops in Virginia, Maryland and NC enroute. After that, we will be sticking around the central east coast so we can attend this springs SHAREFEST in May. Very excited to get on the road and gnome around this country.

Monday, November 9, 2015

We Keep on Rollin

"" Update: March 2016 - During our trip to NZ, we sent the camper out to the great guys at Pocono RV in PA. We had been in contact with them for some time to fix up the axle. They were one of a very few RV and camper locations that would work on such an old model and they were relatively close by. They took care of the old girl and fitted her with a new leaf spring axle including breaks and hubs. It totally changes the look and height of the vehicle. No really... the camper now sits about 5" higher so much that the stabilizer feet don't reach the ground. Yay, new complication to be fixed. All in due time right? ""

When we got the Starcraft, the tires looked fine and dandy. Sure a little rust color on the hub but nothing a little elbow grease couldn't fix. Upon closer inspection however, I noticed a lot of cracks on the sidewall of the tires.

This might be fine for a while but a potentially debilitating blowout on the highway could leave us very stranded, even with a spare. I decided to purchase replacement tires for each side. I was very excited when that new rubber on rim came shipped to the door. 5 Lugs and the deed is done.


I used a fourway lug wrench and the lugs loosened surprisingly easy. I jacked up the trailer to get the wheel off the ground and uncrewed the remaining lug nuts off the tire. So there we are, it should just slide right off, right? WRONG! The thing wouldn't budge. I pushed and pulled but nothing was working. We ultimately had to let the air out of the old tire to get it one.

This seemed strange to me. Why would you have to let air out of a tire to replace it? This seemed like something I needed a second opinion on.

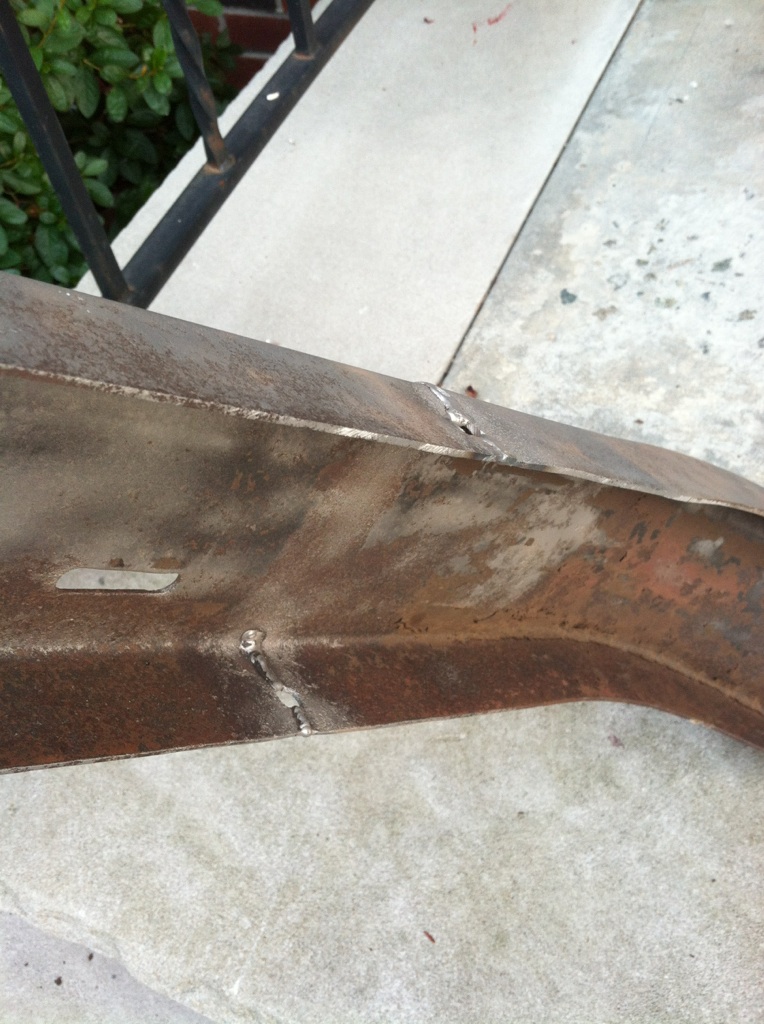
I use the all mighty internet search function to find other folks out there who had similar issues of replacing the tire. It led me to people with axle issues. People said the key to finding your exact type of axle is to find the manufactures tag which is sometimes missing. Fortunately, our axle still had it welded to the exterior as seen below. 

I did some investigating and found out that the axle type used on the camper is called a Torsion Axle specifically from the patent by C.W. Henschen and manufactured by a now-extinct company, Duraflex. Basically, there are four rubber cylindrical rods in the square metal axle frame and these rubber rods act as a flexing point for the axle to move up or down for a smooth suspension.
Unfortunately, it seems that these types of axles expire with age as do most things. What should have happened when I jacked the side up was the wheel would drop down in the hub and thus allow for easy removal and replacement of the tire. Bummer

I quickly found out that these are no longer made (dur) but a company by the name of Dexter makes a very similar product. I reached out to their engineering dept and they ran some specs and asked a lot of questions that I didn't have the answers to but we made do anyways. They gave me a product number and I then reached out to local RV repair shops, auto body shops, RV dealerships, fix-em-up garages and basically any motor-head I could find.

It looks like the axle would be a special order and would have to be properly measured by a 'competent' individual who could then relay the necessary measurements to the engineers and manufactures. Then, once completed and shipped, I would need this hunk o metal attached to the frame. Something I could probably do with a lift, welding materials, a 3rd and 4th hand and about 10 years experience not to mention a workshop of tools and supplies.

This one is still a work in progress and I am looking at different avenues to get this fixed before our journey. I figure we can drop it off at a shop for a few weeks during the cold months to get this sorted. We got a lot completed thus far and can let the Starcraft get pampered at a mechanic.


I decided to put the new wheels on which involved deflating them, wedging it in the space between the fender and brake hub, and then re inflating them. At least it looks better and safer than the old ones.


See you in hell old rotting tires.

Friday, October 30, 2015

A Firm Floor for Feet

This camper update was no surprise. When we first saw the craft, we immediately noticed the give and sag of the vinyl flooring. It was still supportive under our weight and wasn't as if you would fall through to the ground, Flintstones style but we knew it was in certain need of repair. The firsts step involved box cutting the well worn vinyl 'tile' out and tossing that mess to the scrap heap. Once removed, we were hit with the realization that once again, we were in the thick of a large scale project.

Original Early 80's tile flooring


The floor was another pancake style build with a top layer of wood underlain by Styrofoam underlain by another piece of wood; all of which was screwed down through the aluminum water barrier on top of the metal frame. We cut out all the flooring down to the aluminum sheeting (which was a lovely turf green) and removed all the scary rusty screws we could. Some had to be dremeled and destroyed beyond recognition. We also pulled all the vinyl out of the cabinets where multiple spots were still wet and soft. Those locations were squirted with some GreatStuff Foam in a can (watch out, it expands alot!) and added wood fillers if it was needed. That should hold for a while, Right?


We laid out planks which were supported by the horizontal running framework. We also marked up with spray paint/tape/marker where these supports were. Numerous times, we almost took the plunge right through the aluminum due to missed steps.

Everyone working Hard to get the flooring Out

For the repairs, we didn't skip steps. We went straight to the plywood boards overlain by a thin sheet of Luan wood. The plywood was cut to replace the center walk way and the entrance area including the interior/exterior accessed cubby (aka the door side kitchen bench). Other spots were deemed ok to stay.


We waiting till after painting the cabinets to install the new flooring. This way, there was no chance to make a mess on our beautiful new floor. And no tape either! (Well at least less tape since the tabletops were to remain original) For the cabinet body color, we used paint from the hardware store that was a mismatched batch for reduced price. It also was a special type of paint to reduce chips when bumped or knocked. We got primer and paint in place and let dry for a week.

When we came back, the floor was fit for install. We used remnants of the flooring from the cabin that Mark was more than willing to give up and get out the door. The tongue-in-groove fitment was a little tricky at first to operate with but after some pushing, and cutting and wedging, we put the majority of the panels in place. All in all, we had ONLY one whole plank and a couple small scraps left. AMAZING
We have yet to do the trim pieces along the edge which will seal any gaps and give a nice finish. Until then, here's some pictures of what it looks like. We got some of the cabinets (drawers) in last weekend with new home made dividers and will be putting the rest of them on hopefully this weekend.


Not bad huh. Well we are getting there piece by piece and hopefully can sum up the major stuff before it gets too darn cold to be outside in the weather.

Thursday, October 22, 2015

Almost Framous

This one was a relatively easy 'fix' on our Camper so I wont draw out a long story. The original color of the frame, bumpers and tongue was a lovely rusty brown. YUM. Reminded me of everyone's favorite emoji. We used a power drill sanding wheel bit (home depot) and a circular sander to get most of the rust off. Pulled the Propane tank off and taped the body.

BEFORE


The rear left bumper had been hit (or hit something) and was bent out of shape. My father worked his connections and was able to get this repaired by an old work buddy at no cost! Reshaped and welded as needed in addition to a good sanding from their shop.
Special THANKS to Tolin Design in Emerson NJ.

BEFORE

AFTER


Screw hardware was replaced for each bumper in the rear and the stabilizing feet were swapped all around since the jack-holes were beginning to warp and we feared it might break in our travels.

AFTER PAINT AND NEW JACKS


The original A-frame tongue jack had a bum wheel and a broken and bent crank handle along with being a huge rust bucket. The jack and A-Frame section was welded on so we cut off the jack and weld beads with a lot of elbow grease and a hack saw. 

The new jack was bought on Amazon and is mounted on the door side (left) of the camper. When hooked up to our tow vehicle (TV), it releases from vertical and swings to a horizontal position for transport.

We anticipate painting the bed support poles (6x) black to match the frame but that's still to come. The black is a nice solid color and should prevent future rust accumulation. In total, I used 3X Cans of Rustoleum Black Spray paint. Nothing special here.